
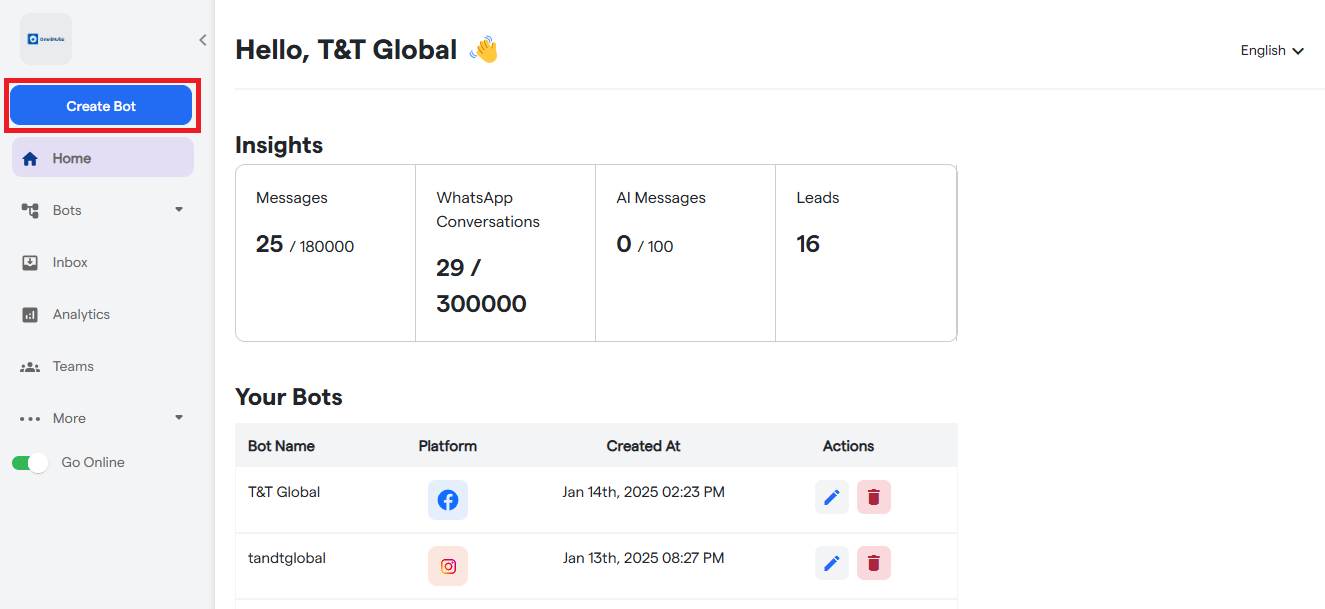
- Login to your Omnihubs Portal and Click the "Create Bot" button on the top right.
-
Select "WhatsApp" as the platform on the next page.
Choose Platform

-
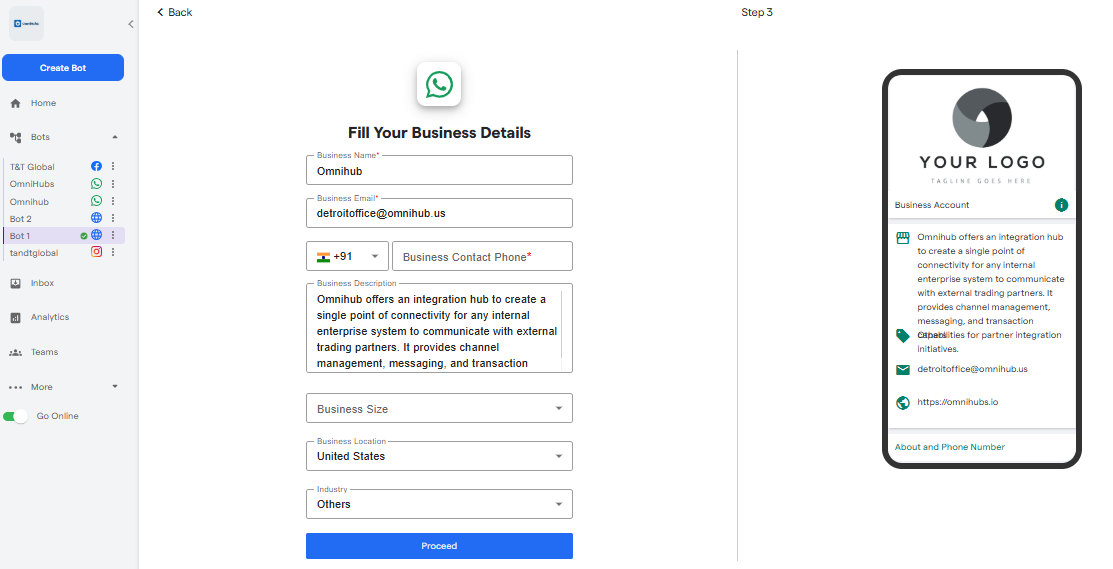
Provide the required details and follow the bot creation process.
-
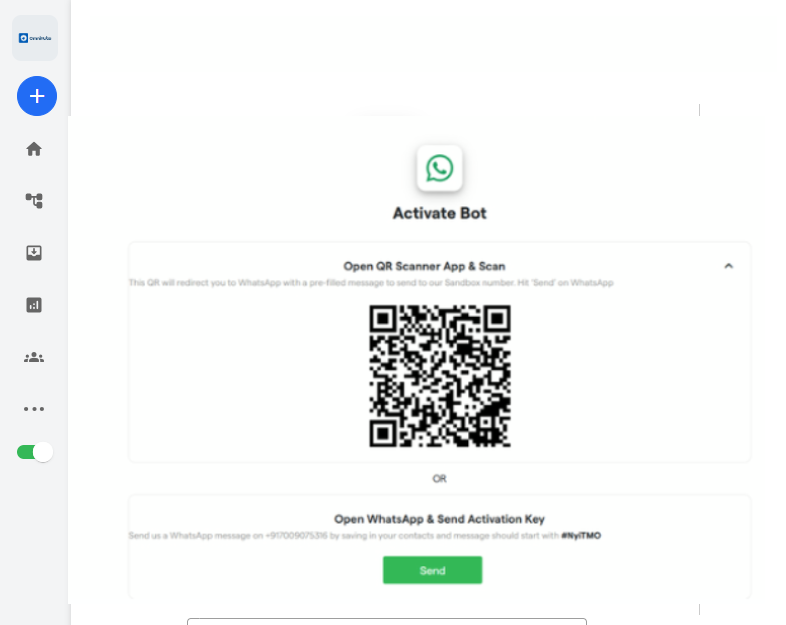
Scan the QR Code and initiate a WhatsApp message to create the demo bot 1st. Scan or Send Confirmation message
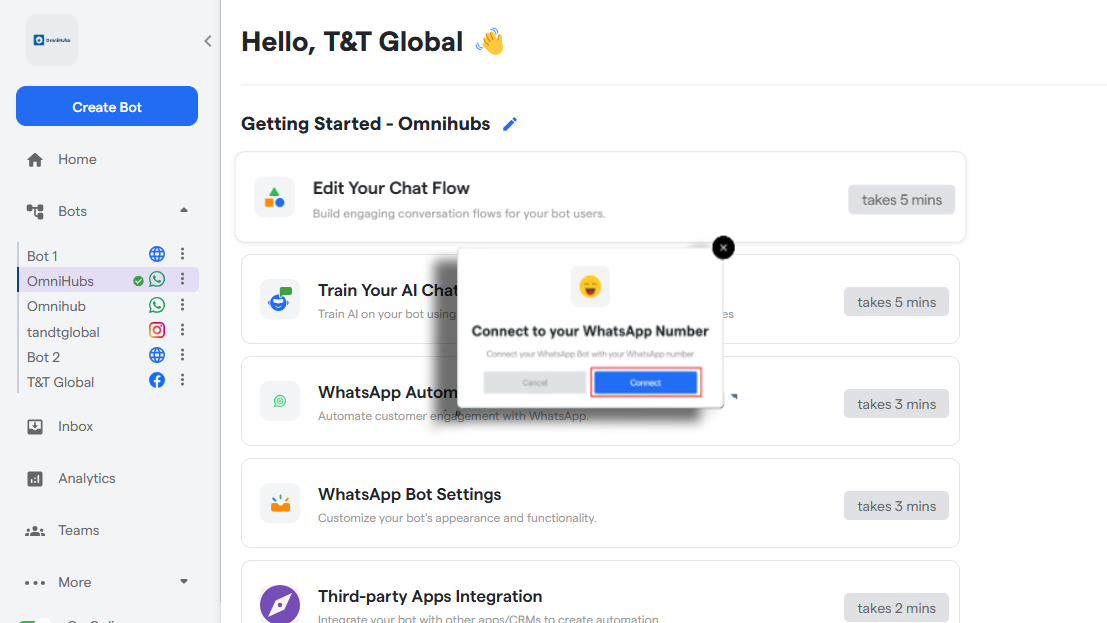
- Upon successful verification, Click "Connect to your WhatsApp number" to start the Automated onboarding.
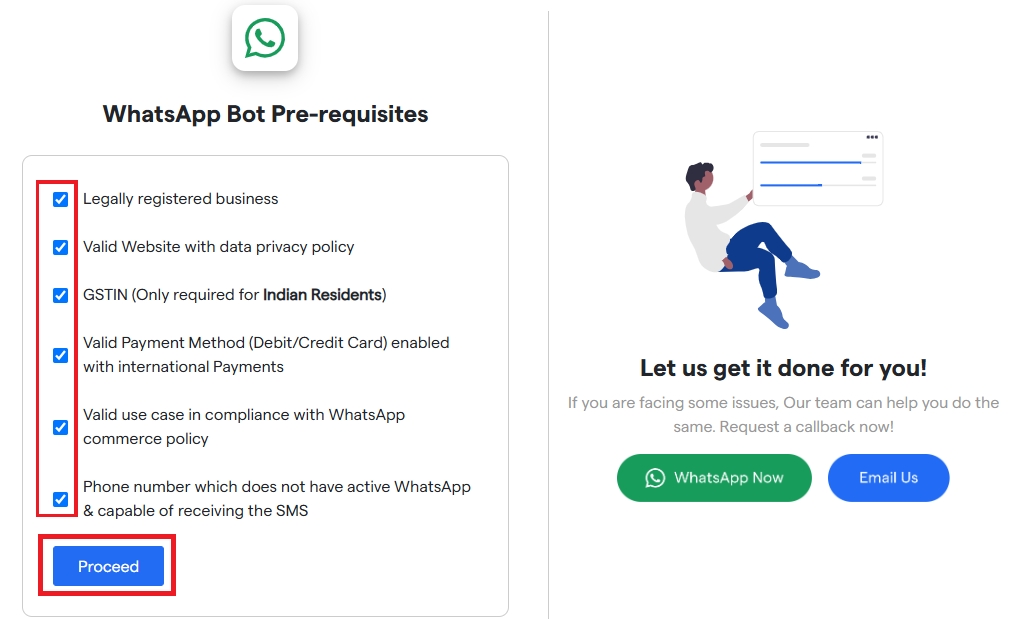
- Select all the pre-requisite and click "Proceed"
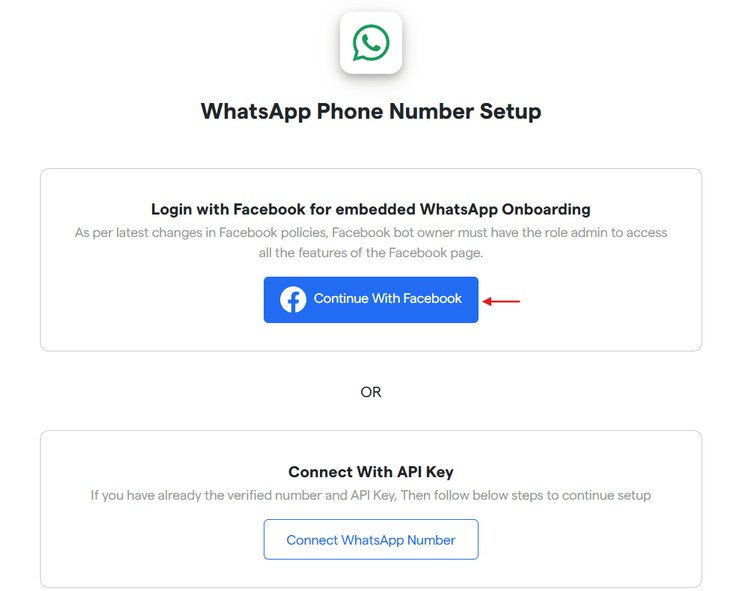
- Choose Automated or Manual onboarding. In this document, We will talking about Automated onboard.
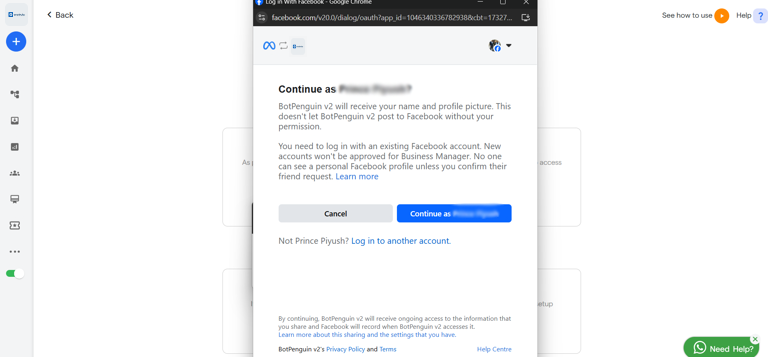
- It will open up a new pop-up window where you have to complete the Meta onboarding.
- Upon successful completion, Your bot will be connected to WhatsApp. But as a last step, You have to update your payment method.
-
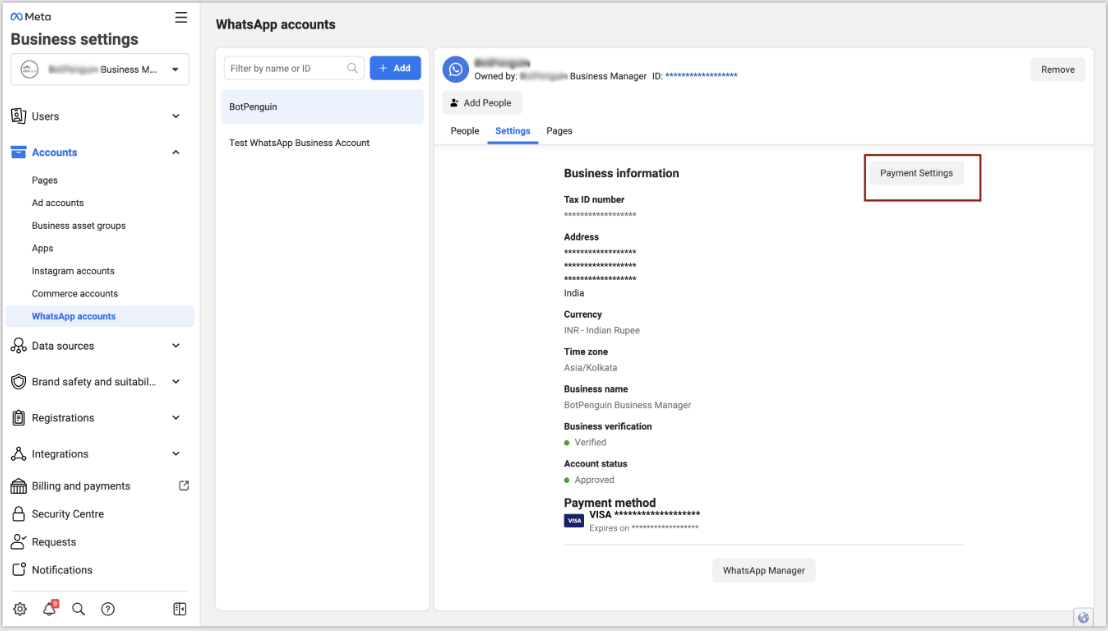
3.1 Access WhatsApp Account Settings
In the "Meta Business Manager," locate and click on the "Payment Setting" button for your WhatsApp Account.
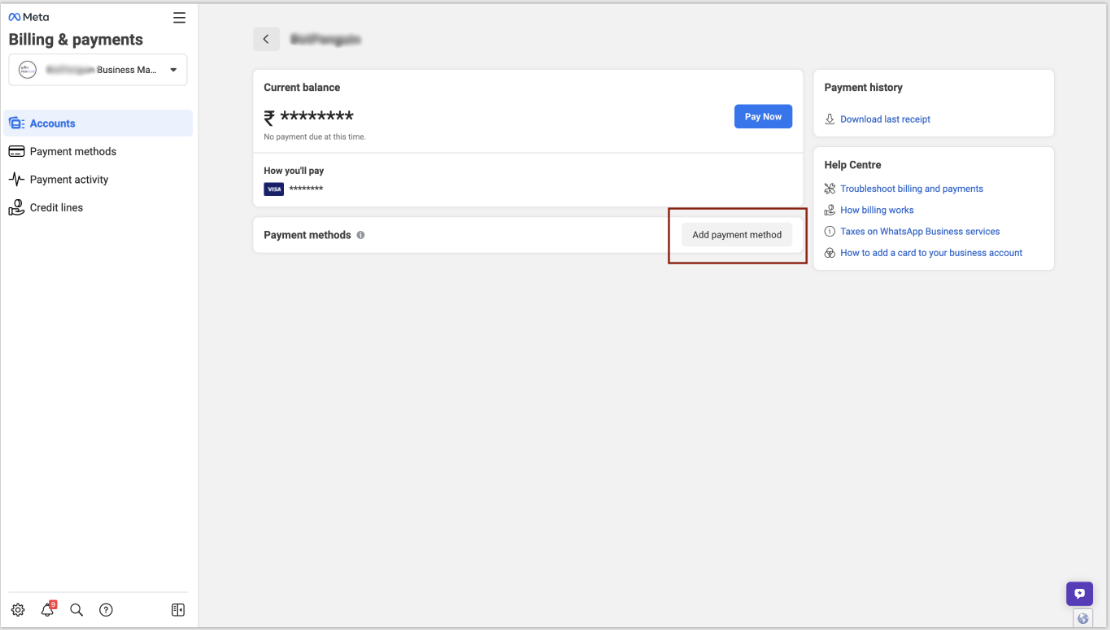
- 3.2 Navigate to Billing and Payments Page
On the "Billing and Payments" page, click on the "Add Payment Method" option to add a new payment method.
- 3.3 Select Payment Method Type
Choose the payment method type that you want to use for your WhatsApp account.
Select Payment Method Type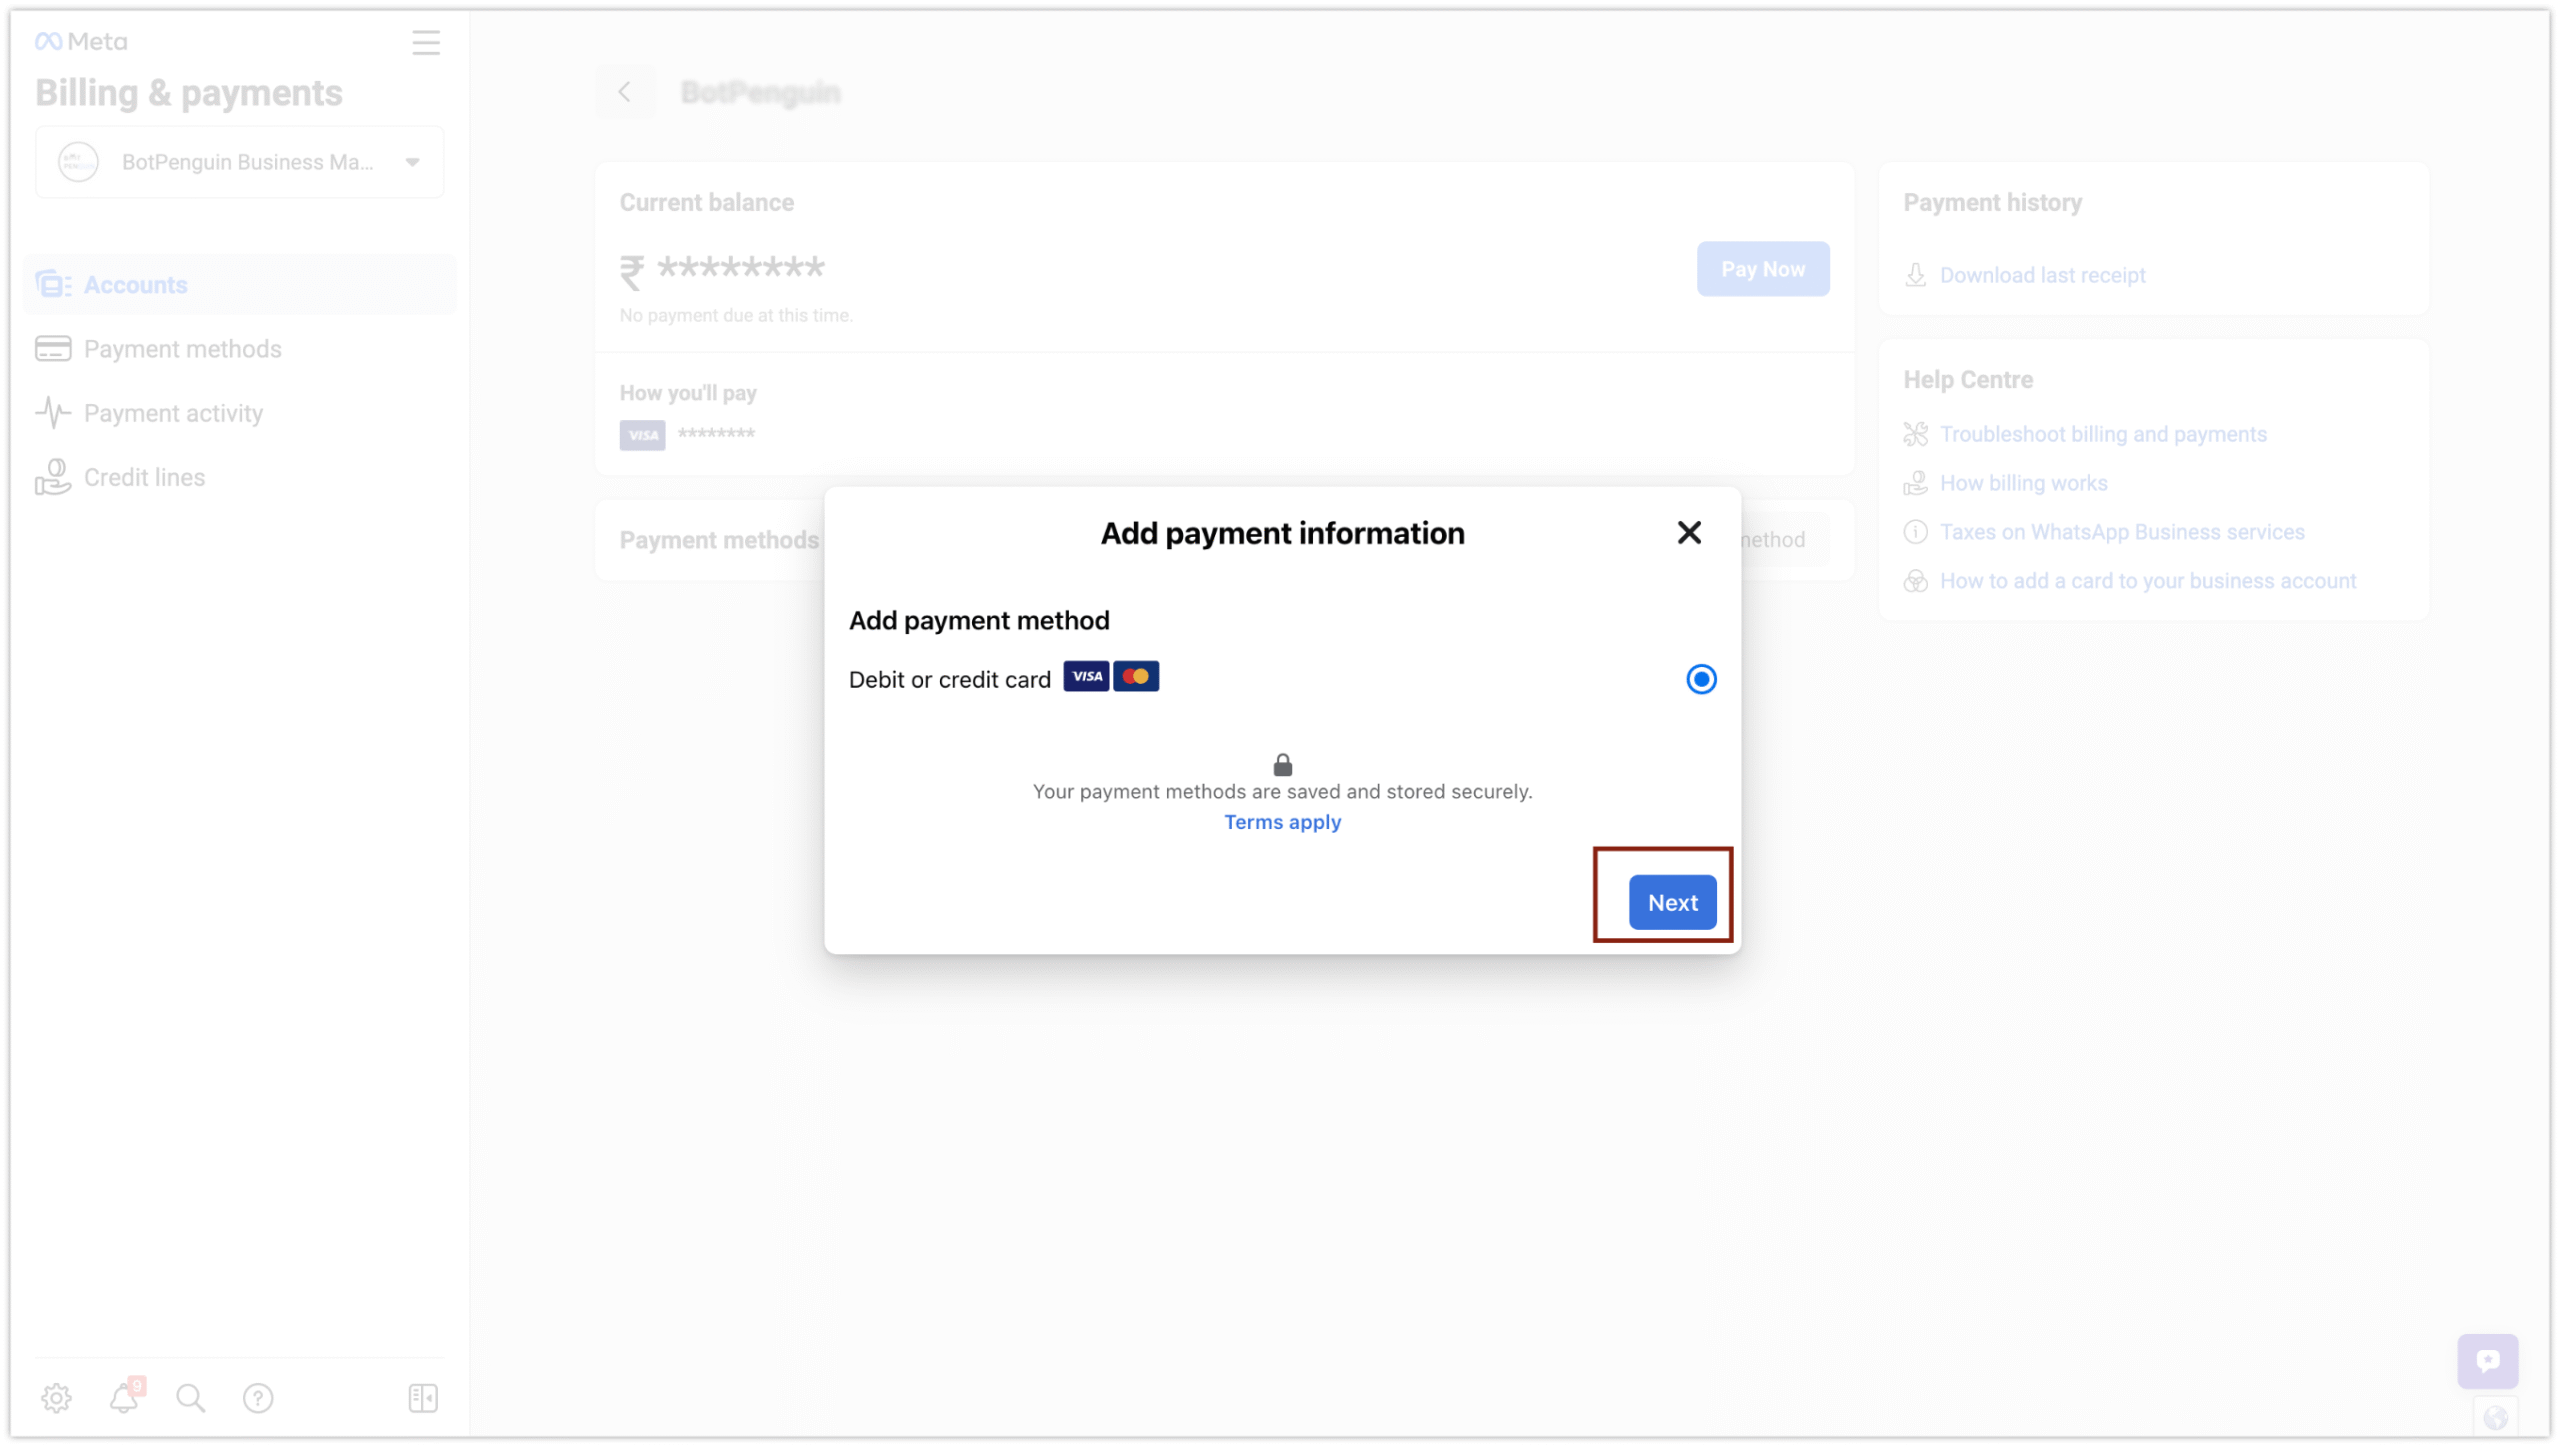
- 3.4 Enter Payment Details
Enter the necessary payment details based on the selected payment method.
Enter Payment Details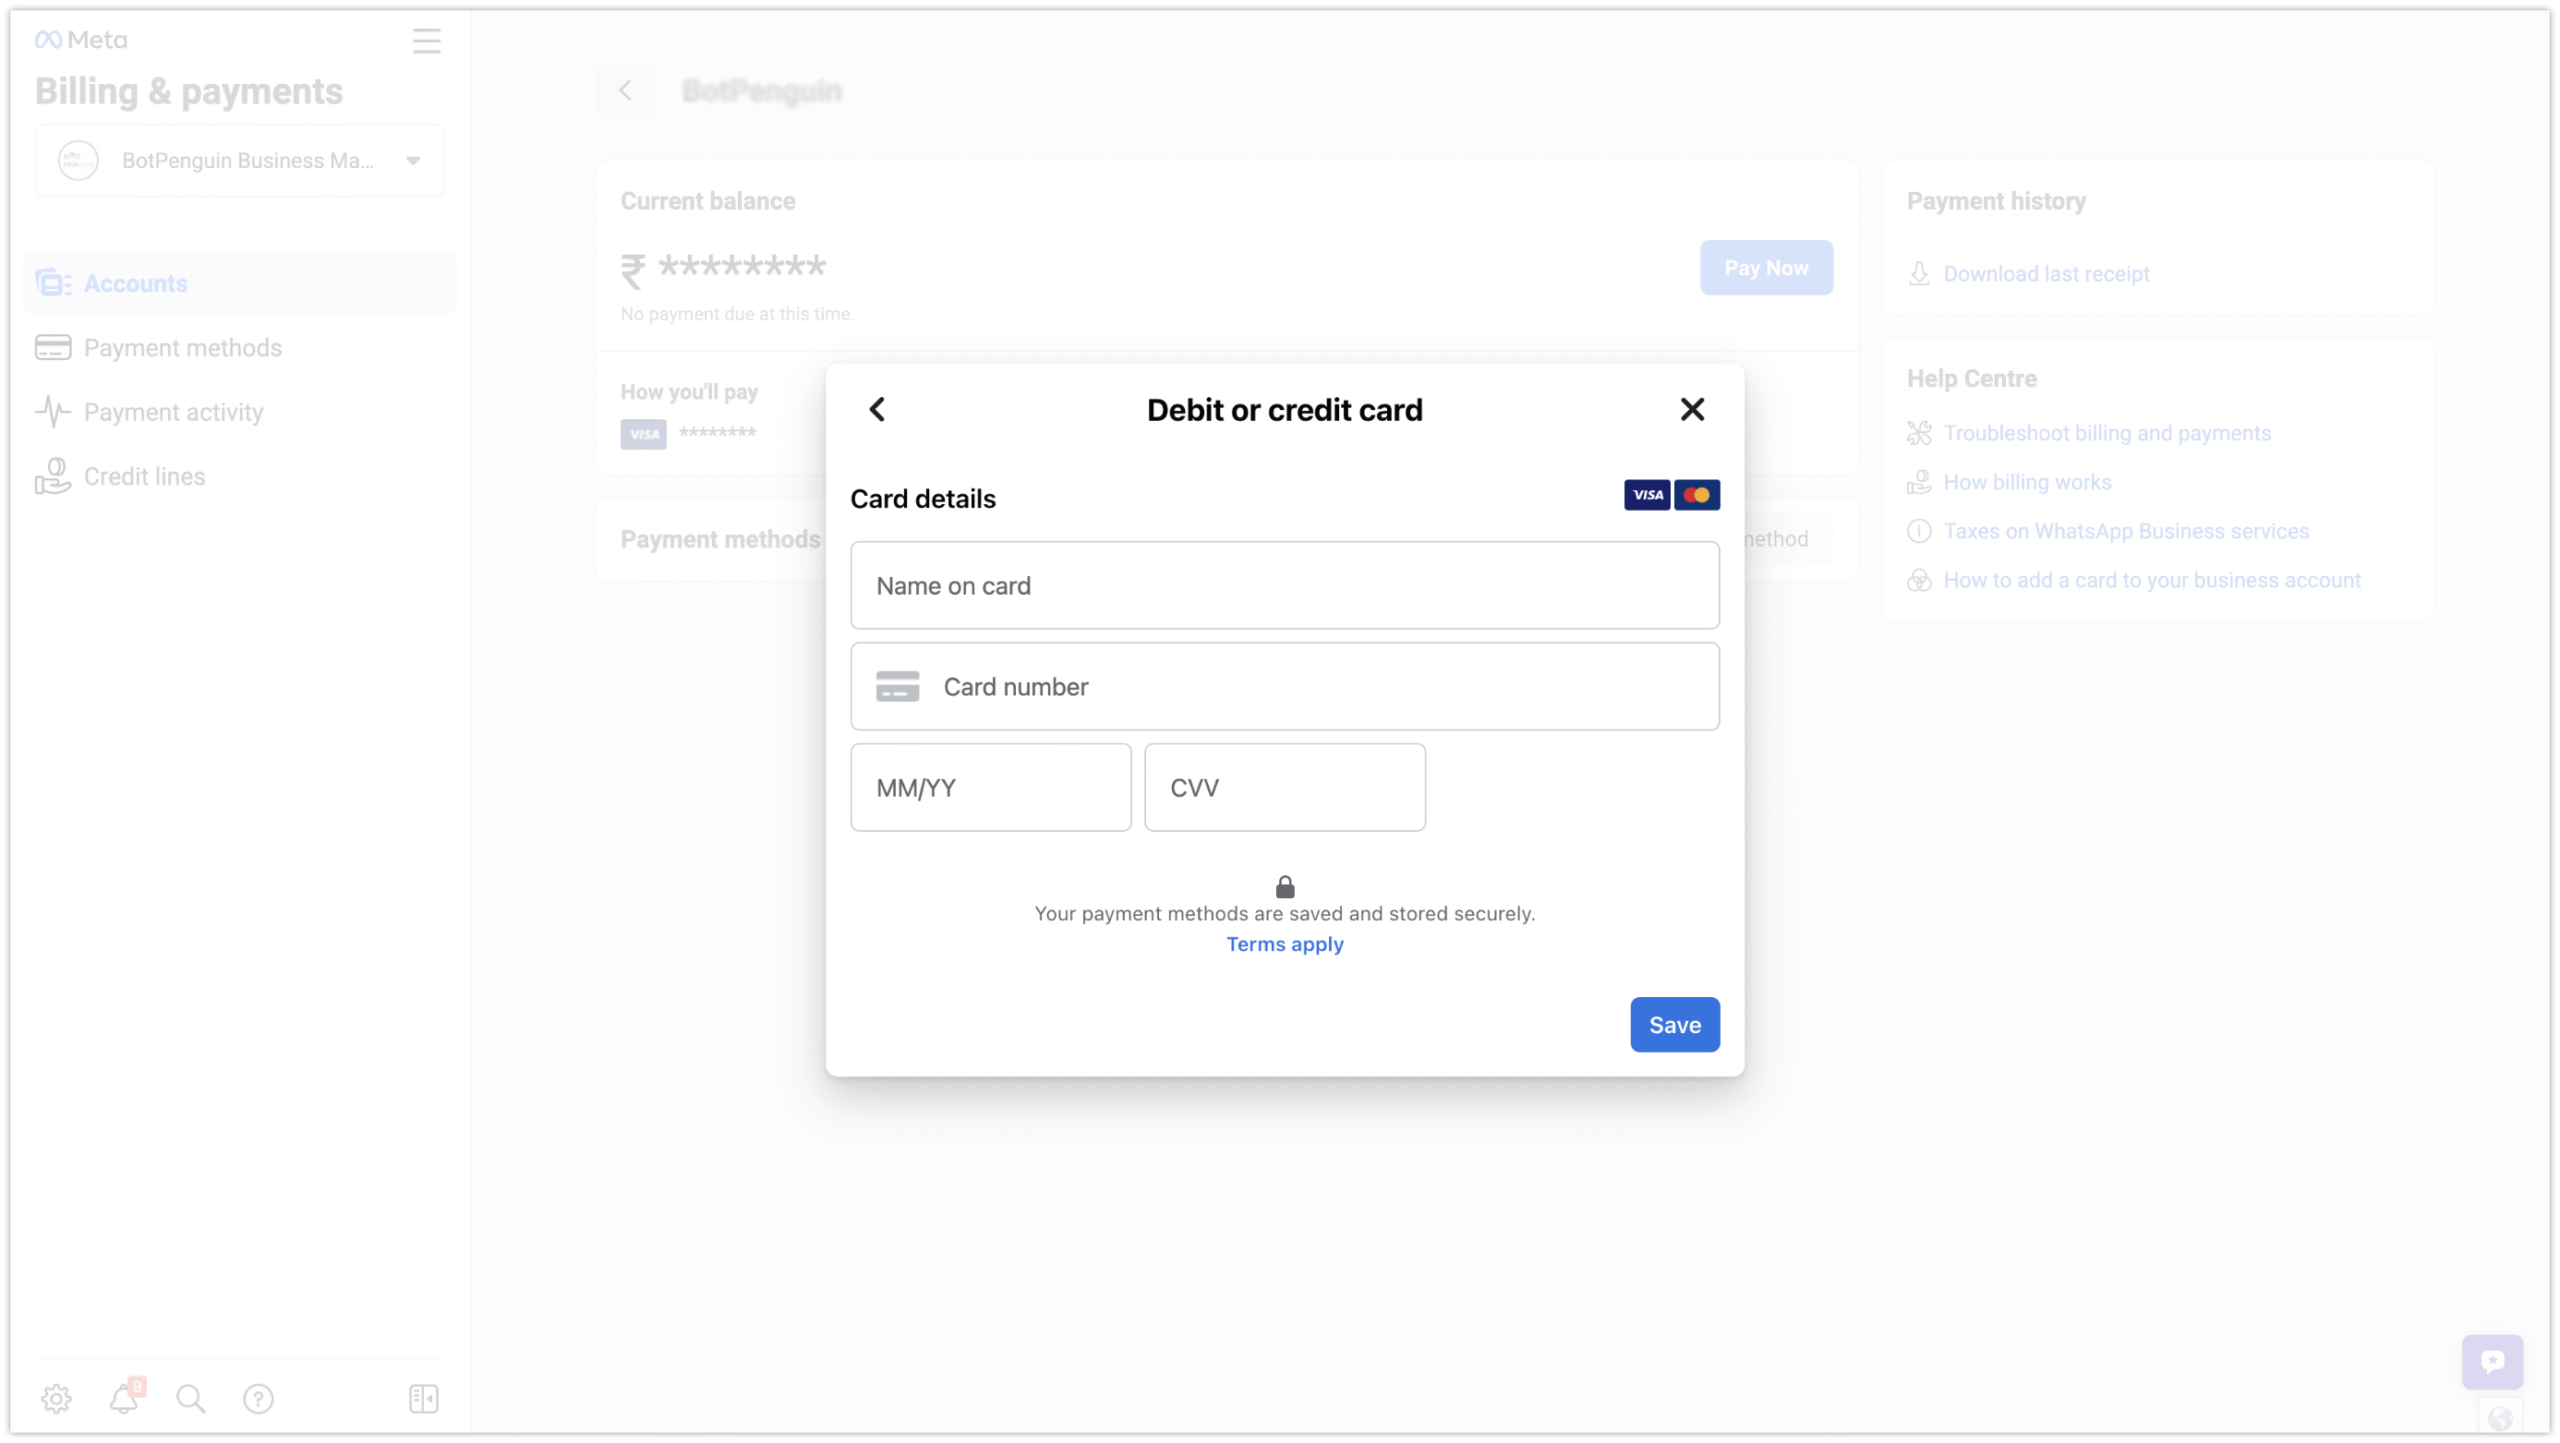
- 3.5 Verify Payment Method
Once you have entered the payment details, proceed with the verification process.
- 3.6 Update Business Information
- After successful verification, make any necessary updates to your business information.
- You have successfully updated the payment method on your WhatsApp account.

Step 3: Update Payment Method to WhatsApp
In the Business Manager, update the payment method for your WhatsApp Business Cloud API account to enable seamless transaction processing.
Congratulations! You have successfully created the Omnihubs WhatsApp Bot using the WhatsApp Business Cloud API and integrated it with the Omnihubs platform. Your WhatsApp Bot is now ready to interact with users and provide automated responses.


